
 English
  日本語
日本語  Français
  русский
  Português
  Español
  عربى
عربى 
The smell coming from your kitchen sponge is caused by bacteria — and in most cases, it can be eliminated in under two minutes. A damp sponge left on the sink after use becomes one of the most bacteria-dense objects in the average home within 24 to 48 hours. Studies have identified over 362 distinct bacterial species in used kitchen sponges, with bacterial densities reaching 54 billion bacteria per cubic centimeter in heavily used specimens. Understanding exactly why this happens — and which specific fixes actually work versus which ones are largely ineffective — is the difference between a genuinely clean kitchen and one that only looks clean on the surface.
The Real Reason Your Sponge Smells
The odor produced by a used kitchen sponge is not simply the smell of old food particles. It is the byproduct of active bacterial metabolism. As bacteria break down organic matter trapped inside the sponge — food residue, grease, proteins, and sugars — they produce volatile organic compounds (VOCs) as metabolic waste products. These compounds include sulfur-containing gases such as hydrogen sulfide and dimethyl sulfide, which are responsible for the characteristic rotten, sulfurous smell that develops in sponges left damp between uses.
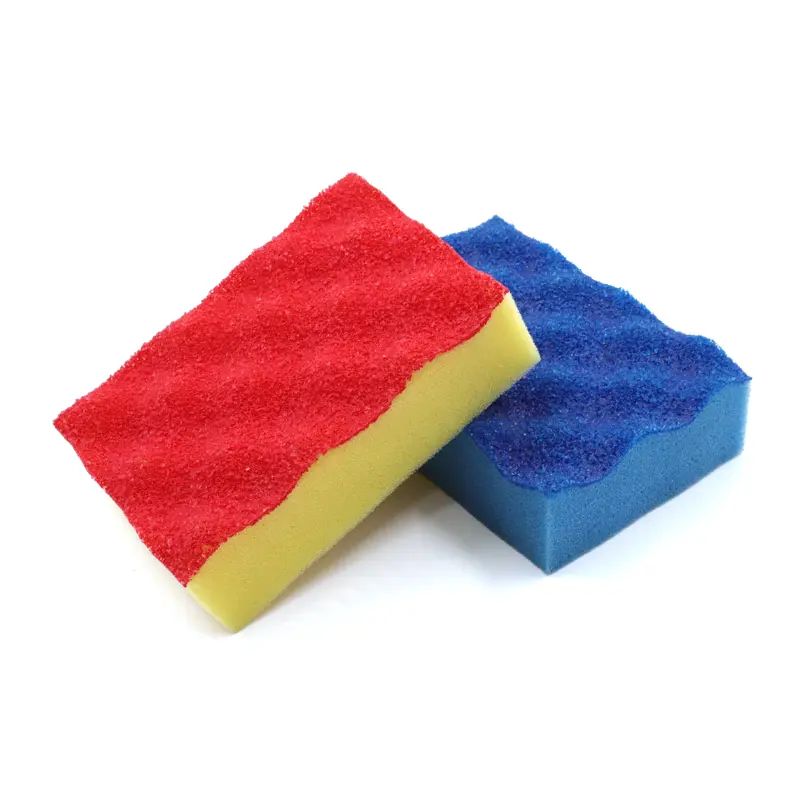
The structural design of a kitchen sponge makes this problem almost inevitable without active intervention. The dense, porous foam interior of a standard cellulose or polyurethane sponge creates an enormous surface area — a single standard kitchen sponge has an estimated internal surface area of several square meters when all pore surfaces are accounted for. This expansive interior traps moisture and food particles in a warm, dark, nutrient-rich environment that is essentially ideal for bacterial growth.
Bacterial populations in a damp sponge can double every 20 minutes under optimal conditions. A sponge left wet on a sink overnight at room temperature can see its bacterial population increase by a factor of thousands between the time you finish washing dishes in the evening and the time you pick up the sponge the following morning. The smell is simply the olfactory signal that this process is well underway.
Which Bacteria Are Responsible
Research published in Scientific Reports identified the bacterial communities present in kitchen sponges and found that the most abundant species belonged to the Moraxellaceae family — the same bacteria responsible for the musty smell in clothes left too long in a washing machine. Other commonly found species include Acinetobacter, Chryseobacterium, and members of the Enterobacteriaceae family, some of which are associated with foodborne illness. The smell is therefore not just unpleasant — it is a reliable indicator of a hygiene problem that extends beyond odor alone.
What Makes Sponges So Vulnerable to Bacterial Growth
Four conditions drive bacterial proliferation in kitchen sponges, and all four are present simultaneously in the typical kitchen environment:
- Moisture: Bacteria require water to survive and reproduce. A sponge that retains moisture between uses provides continuous hydration for bacterial colonies. Sponges left flat on a wet sink surface are particularly problematic because they cannot drain or dry from underneath.
- Nutrients: Every dish, pot, or surface wiped with a sponge deposits food residues — proteins, fats, carbohydrates — that serve as a nutrient supply for bacterial growth. Even a sponge that appears rinsed clean retains microscopic food particles deep within its pore structure.
- Warmth: Kitchen environments typically maintain temperatures of 18–24°C (65–75°F) — well within the optimal growth range for most foodborne bacteria, which is 4–60°C (40–140°F). A sponge sitting near a stove or dishwasher may be exposed to even higher temperatures that accelerate bacterial reproduction.
- Structural protection: The porous interior of a sponge physically shields bacterial colonies from the mechanical and chemical forces that would otherwise disrupt them. Rinsing a sponge under tap water reaches only the surface layers — bacteria in the deepest pores are largely unaffected by a simple rinse.
Understanding these four drivers clarifies why some common sponge-cleaning habits are effective while others provide only superficial improvement.
Methods That Actually Eliminate Sponge Odor
Not all sponge-cleaning methods are equally effective. The following approaches have documented evidence of meaningful bacterial reduction and odor elimination, ranked from most to least effective.
Dishwasher Sanitizing Cycle
Running a kitchen sponge through a full dishwasher cycle — particularly one that includes a high-temperature sanitizing rinse at 71°C (160°F) or above — is one of the most effective methods for reducing bacterial load. The combination of hot water, detergent, and mechanical action penetrates deeper into the sponge structure than most manual methods. Studies comparing dishwasher sanitizing to other methods found bacterial reductions of 99.9% or greater when a heated dry cycle was included.
Place the sponge on the top rack, away from dishes, and run it through a full cycle with detergent. The heated dry function is important — it removes residual moisture that would otherwise allow bacterial repopulation immediately after the cycle ends. Use this method every 2 to 3 days for sponges in regular daily use.
Microwave Heating
Microwaving a damp sponge is a widely recommended method and one that has been validated by laboratory research. A study from the University of Florida found that microwaving a wet sponge for 2 minutes at full power eliminated 99% of bacteria, including E. coli and other common kitchen pathogens. The mechanism is straightforward: microwave energy heats the water within the sponge uniformly, and the resulting steam temperature is sufficient to denature bacterial proteins and disrupt cell membranes throughout the sponge's interior.
Critical safety requirements for microwave sanitizing:
- The sponge must be wet before microwaving. A dry sponge placed in a microwave can catch fire. Always saturate the sponge with water first.
- Only use sponges without metallic scrubbing pads or metallic fibers — metal in a microwave creates arcing and poses a fire risk.
- Allow the sponge to cool for at least 2 minutes before handling — it will be extremely hot throughout.
- Microwave on full power for 1 to 2 minutes depending on sponge size and microwave wattage.
Bleach Solution Soaking
Soaking a sponge in a diluted bleach solution is an effective chemical approach to bacterial reduction. The recommended concentration is 1 tablespoon of household bleach (sodium hypochlorite) per 1 quart (approximately 1 liter) of water. Submerge the sponge fully and allow it to soak for 5 minutes minimum. This concentration and contact time is sufficient to achieve a significant reduction in bacterial populations across both surface and deeper pore layers.
After soaking, rinse the sponge thoroughly under running water and squeeze out excess moisture. Allow it to dry in a well-ventilated position. Bleach solution soaking is particularly effective for sponges with heavy odor buildup, where the chemical penetration of hypochlorite reaches areas that heat methods may not fully address. However, repeated bleach soaking will degrade sponge material faster than other methods, shortening the functional lifespan of the sponge.
White Vinegar Soaking
White vinegar (acetic acid at 5% concentration) is a moderately effective antibacterial agent and a strong deodorizer. Soaking a sponge in undiluted white vinegar for 5 minutes reduces bacterial populations and neutralizes many of the odor-causing volatile compounds through chemical reaction rather than simply masking the smell.
Vinegar is less effective than bleach or heat against resilient bacterial strains, but it is a practical daily option for maintaining sponge freshness between more intensive cleaning sessions. It is also safe for all sponge types, does not degrade sponge material significantly, and leaves no chemical residue that requires thorough rinsing. For light odor management between weekly deep-cleaning sessions, a 5-minute vinegar soak is a convenient and effective maintenance step.
Methods That Do Not Work as Well as People Think
Several widely practiced sponge-cleaning habits provide minimal actual bacterial reduction despite appearing logical or feeling thorough.
Rinsing Under Hot Tap Water
The most common sponge-cleaning habit — rinsing under hot running water after use — is also among the least effective. Household hot water taps typically deliver water at 49–60°C (120–140°F), which is too low and too brief in contact time to meaningfully reduce bacterial populations within the sponge's porous interior. The mechanical flushing action removes some loose surface debris but does not penetrate to the bacterial colonies residing in the deeper pore structure. Research consistently shows that a rinsed sponge has a bacterial count very close to an unrinsed one within the same 24-hour period.
Dish Soap Washing
Washing a sponge with dish soap and squeezing it repeatedly under running water feels thorough but achieves limited bacterial reduction. Standard dish soaps are not formulated as disinfectants — they are surfactants designed to lift grease and food particles from hard surfaces. They do not contain active biocidal agents at concentrations sufficient to kill bacteria within the protected pore structure of a sponge. Soap washing may reduce odor temporarily by removing some surface organic matter, but bacterial populations within the sponge rebound within hours.
Leaving the Sponge to Air Dry on Its Own
Air drying does slow bacterial growth by removing moisture — bacteria cannot reproduce in a completely dry environment. However, a standard kitchen sponge placed flat on a sink surface in a typical kitchen environment takes 4 to 8 hours to dry completely, during which bacterial growth continues unimpeded. In humid kitchens or climates, complete drying may take even longer or may not be achieved at all between uses. Air drying is a useful supplementary habit but is insufficient as a primary odor and bacteria control strategy on its own.
A Practical Cleaning Schedule That Works
The most effective approach combines daily habits with regular deep-cleaning to keep bacterial populations consistently low rather than allowing them to build up and then attempting periodic elimination.
| Frequency | Action | Purpose |
|---|---|---|
| After every use | Squeeze out all excess water and place upright or on a draining rack | Reduce moisture to slow bacterial growth between uses |
| Daily | Microwave (wet) for 1–2 minutes OR soak in white vinegar for 5 minutes | Reset bacterial load before it reaches odor-producing density |
| Every 2–3 days | Run through dishwasher on sanitizing cycle with heated dry | Deep bacterial reduction across full sponge interior |
| Weekly | Soak in bleach solution (1 tbsp per 1 qt water) for 5 minutes | Chemical disinfection targeting resilient bacterial strains |
| Every 1–2 weeks | Replace the sponge entirely | Eliminate accumulated bacterial biofilm that cleaning cannot fully address |
The replacement interval of every 1 to 2 weeks may seem more frequent than many households practice, but it reflects the reality that no cleaning method fully eliminates bacterial biofilm once it becomes established in the deep pore structure of a well-used sponge. Biofilm is a structured bacterial community encased in a protective matrix of polysaccharides that significantly resists both chemical and thermal disinfection. Once a sponge has developed significant biofilm — typically after 1 to 2 weeks of daily use — replacement is more effective than continued cleaning attempts.
Storage Habits That Make a Significant Difference
How and where a sponge is stored between uses has a direct impact on how quickly bacterial populations build up and odor develops. Small changes in storage practice can meaningfully extend the fresh life of a sponge between cleaning sessions.
Use a Sponge Holder That Promotes Drainage and Airflow
A sponge left flat on a wet sink surface stays wet on its underside indefinitely, creating the persistent moisture that drives bacterial growth. A raised sponge holder or suction-mounted caddy that holds the sponge upright or elevated allows water to drain away from all surfaces and air to circulate around the sponge. In controlled comparisons, sponges stored in ventilated holders develop measurably lower bacterial counts after 24 hours than sponges left flat on sink surfaces under otherwise identical conditions.
Sponge holders cost between $5 and $20 and represent one of the most cost-effective hygiene improvements available for a kitchen sink area. Wire or open-frame designs outperform solid-walled holders because they allow airflow on all sides of the sponge.
Keep the Sponge Away from Raw Meat Preparation Areas
Using a single sponge for both general dish washing and wiping surfaces that have come into contact with raw meat, poultry, or fish dramatically increases the risk of introducing pathogenic bacteria such as Salmonella, Campylobacter, and Listeria into the sponge. Maintain a dedicated sponge or cloth for post-raw-meat surface cleaning, and treat it as a single-use item — dispose of it after use rather than returning it to the regular rotation.
Squeeze Thoroughly After Every Use
A fully saturated sponge takes significantly longer to dry than one that has been squeezed to remove the majority of its water content. Making a habit of squeezing the sponge firmly several times after the final use of the day — and then standing it upright — reduces the moisture available for bacterial overnight growth. This single habit, consistently applied, can noticeably extend the interval between cleaning sessions before odor develops.
Signs Your Sponge Is Past Saving and Needs to Be Replaced
Even with diligent cleaning, every sponge eventually reaches a point where replacement is the only effective solution. Continuing to use a sponge past this point means spreading bacteria across every surface it contacts rather than cleaning them.
- Persistent odor that returns within hours of cleaning: If a sponge smells again within a few hours of being microwaved or bleach-soaked, established biofilm is producing odor faster than cleaning can eliminate it. This is a reliable indicator that the sponge has exceeded its useful hygienic life.
- Visible discoloration or dark spotting: Black, green, or brown spots on a sponge indicate mold or heavy bacterial colonization. No cleaning method reliably eliminates established mold growth from inside a sponge — replace immediately.
- Physical degradation: Tearing, crumbling, or significant compression set (the sponge no longer springs back to shape) indicates structural breakdown. A degraded sponge traps more debris in its irregular surfaces and is harder to clean effectively.
- More than 2 weeks of daily use: Regardless of appearance or smell, a sponge used daily for more than 2 weeks should be replaced as a precautionary measure. At this point, accumulated biofilm makes the sponge a net negative for kitchen hygiene even if it appears and smells acceptable.
Alternatives Worth Considering If Sponge Odor Is a Recurring Problem
For households where sponge odor is a persistent frustration despite good maintenance habits, switching to an alternative cleaning tool may resolve the problem structurally rather than requiring ongoing management.
| Alternative | Odor Resistance | Cleaning Effectiveness | Estimated Lifespan |
|---|---|---|---|
| Silicone scrubber | Excellent — non-porous surface | Good for light to medium soiling | 6–12 months |
| Dish brush with handle | Good — dries faster than sponges | Very good, especially for pots | 2–4 months |
| Cotton dishcloths | Moderate — machine washable | Good for surfaces and light dishes | Months to years with washing |
| Cellulose sponge cloth | Good — dries faster than foam sponges | Very good, highly absorbent | 4–8 weeks with washing |
| Copper or stainless scrubber | Good — metal has natural antimicrobial properties | Excellent for tough baked-on soiling | 3–6 months |
Silicone scrubbers and dish brushes are particularly effective alternatives for households that struggle with sponge odor because their non-porous or quick-drying structures deny bacteria the persistent moisture and surface area they need to proliferate. A silicone scrubber rinsed after use and left to air dry will typically remain odor-free for weeks, compared to a standard foam sponge that may develop noticeable odor within 48 hours of use without active cleaning intervention.
Smell Is a Signal, Not Just an Inconvenience
A smelly kitchen sponge is not just unpleasant — it is a reliable indicator that you are washing dishes and wiping surfaces with a tool that is actively depositing bacteria rather than removing it. The fix is straightforward: microwave or dishwasher-sanitize your sponge daily, store it in a ventilated holder, replace it every 1 to 2 weeks, and never use a sponge that smells persistently even after cleaning. These habits cost almost nothing in time or money but make a measurable difference to the actual hygiene of your kitchen — not just its appearance.